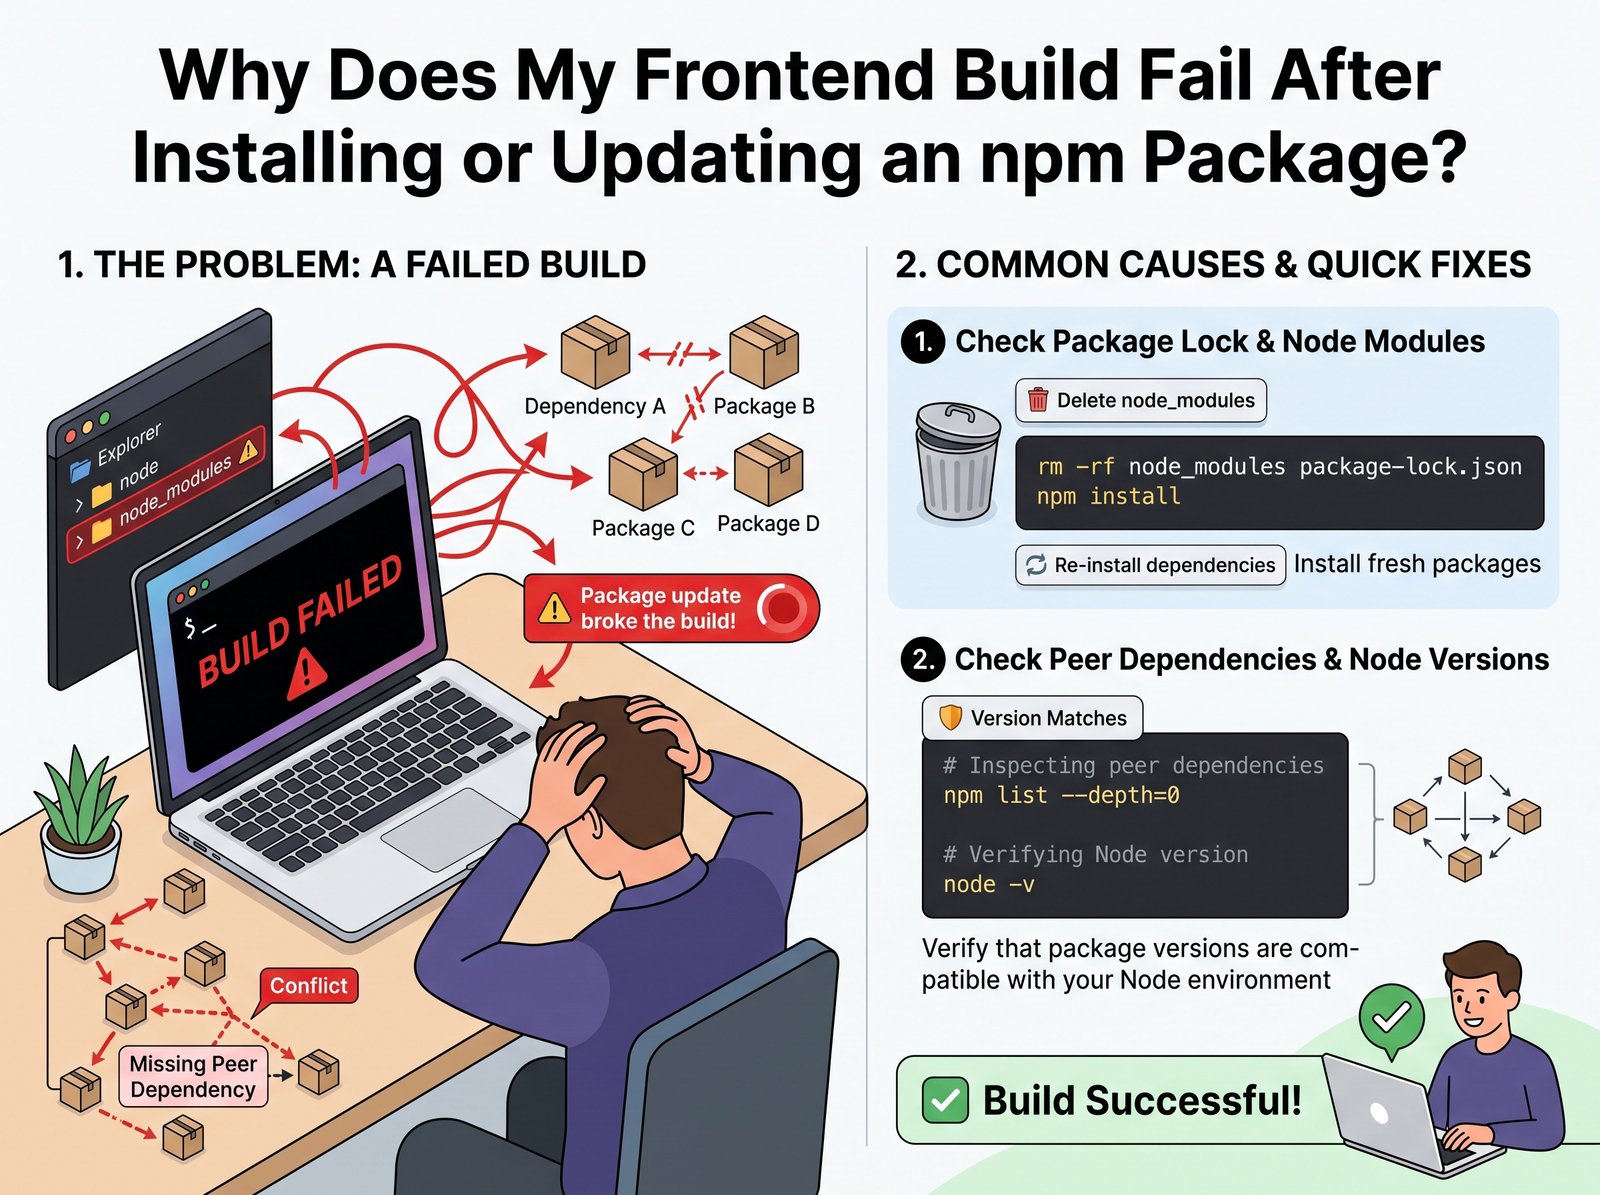
A frontend build can fail immediately after installing or updating an npm package because the new dependency is incompatible with your existing project, introduces conflicting peer dependencies, requires a different Node.js version, or changes how its modules are exported. In other cases, the package installs successfully but the bundler cannot resolve an import, compile its code, or run the production build.
The key distinction is that a successful npm install does not guarantee a successful frontend build. Installation resolves dependencies and creates the local package tree; your build tool must still process the application and its dependencies according to the project’s configuration and runtime requirements.
Whether you are working with React, Next.js, Vue, Vite, or another JavaScript framework, the fastest way to diagnose the problem is to identify the first meaningful error, inspect what changed, and test a targeted fix. Reinstalling everything or forcing dependency resolution without understanding the conflict can make the project harder to maintain.
1. Dependency Conflicts Between npm Packages
One of the most common causes of a broken build is a dependency conflict. A package may require a particular version of React, a build tool, or another library that differs from the version already installed in your project.
For example, a UI library may declare a peer dependency on a particular range of React versions. If your project uses a version outside that range, npm may report an ERESOLVE error during installation. Even if installation completes, incompatible APIs can cause errors during compilation or runtime.
How to identify the conflict
Start by reading the complete terminal message. Look for ERESOLVE, peer dep, Found, and Could not resolve dependency. These lines often identify the packages and version ranges involved.
Run:
npm ls react
npm ls
The first command helps inspect the installed React dependency tree. The second reports the dependency tree and may highlight missing, invalid, or conflicting packages.
Check the new package’s peerDependencies in its npm documentation or package.json. Confirm that the version range supports your framework and the other libraries in your project.
How to fix it
Choose a package version compatible with your existing framework, or plan a tested framework upgrade if the new package requires a newer version. Do not upgrade React, Next.js, or several related dependencies blindly just to silence one error.
npm’s official installation documentation explains how npm resolves dependencies and handles lockfiles. Its package.json documentation explains dependency declarations and peer dependencies.
2. The Package Requires a Different Node.js or npm Version
A dependency can install but fail when the build starts because the project uses an unsupported Node.js version. Some packages rely on language features, built-in modules, or module-loading behavior available only in specific runtime versions.
You might see errors such as:
- Unsupported engine
- SyntaxError: Unexpected token
- ERR_REQUIRE_ESM
- A failure while loading the build configuration
Check the versions used by your terminal:
node -v
npm -v
Then inspect the package’s documented requirements, including its engines field if one is provided. Also check the requirements for your framework and build tool. A package’s declared engine range is useful evidence, but not every package enforces it during installation.
If the project specifies a Node.js version through .nvmrc, .node-version, a development container, or deployment settings, use the project’s intended version. Your local machine and CI server should follow the same supported runtime configuration.
Avoid upgrading Node.js without checking the rest of the project. An older dependency or build configuration may also rely on a particular runtime. The goal is compatibility across the full toolchain, not simply using the newest available version.
Let’s Figure It Out.
Tell us what you’re working on and we’ll help you identify the right next step.
Talk to an Expert3. Module Not Found Errors After Installation
A message such as Module not found: Can’t resolve ‘package-name’ usually means the bundler cannot resolve the requested module from the import location.
Possible causes include a package that was not installed in the correct project, an incorrect import path, a missing subpath export, or an import that uses the wrong capitalization.
For example:
import Button from ‘some-ui-library’;
If the package was installed in a different directory or workspace, the application may not be able to resolve it. Similarly, ./components/Header and ./components/header are not interchangeable on case-sensitive filesystems.
Troubleshooting steps
First, confirm that the package is listed in the correct package.json and installed in the correct workspace. Then check its documented exports and the exact import statement.
npm ls some-ui-library
Replace some-ui-library with the actual package name.
For local imports, verify the file path and letter casing. For packages that expose only specific subpaths, use the import path documented by the package rather than guessing a filename inside its distribution folder.
The official Next.js module-not-found guide describes common causes, including missing dependencies, incorrect paths, casing differences, and Node.js-only modules imported into browser code.
4. ESM and CommonJS Compatibility Problems
JavaScript packages can use different module systems. ECMAScript Modules (ESM) use import and export, while CommonJS commonly uses require() and module.exports.
A package update may switch to ESM-only distribution or change the way its entry points are exposed. An older configuration file or plugin that expects CommonJS can then fail with errors such as ERR_REQUIRE_ESM or messages indicating that a package cannot be loaded using require().
This problem is especially noticeable in build configurations, scripts, and tooling because these files may run directly in Node.js rather than through the same transformation process used for application components.
Practical fixes
- Read the error to identify whether the failure occurs in application code or in the build configuration.
- Check the updated package’s documentation for ESM and CommonJS support.
- If the configuration supports ESM, update the relevant import syntax and configuration format according to the tool’s instructions.
- If the package offers a compatible version or documented CommonJS entry point, consider using that instead.
Do not automatically add “type”: “module” to your root package.json. That setting changes how Node.js interprets applicable .js files in the package scope, potentially affecting other configuration files and scripts. Make the change only when it fits the project’s module structure.
The Vite troubleshooting guide provides practical examples of ESM-only packages and configuration-loading errors.
5. A Package Uses Node.js APIs in Browser Code
Frontend applications execute some code in the browser, where Node.js-specific modules such as fs and dns are not generally available as browser APIs.
A newly installed package may work in a server-side script but fail when imported into a client-side component. Vite, for example, documents warnings about Node.js modules being externalized for browser compatibility.
Consider a package that reads local files directly using Node.js APIs. Importing it into a browser-facing React component will not make those APIs available in the browser.
How to fix the issue
Check the package’s intended environment before importing it. If it is designed for server-side use, move the operation to an appropriate server-side route or function and expose only the necessary result to the frontend.
In Next.js, distinguish between code that runs on the server and code included in a Client Component. A server-only dependency should not enter the browser bundle through a shared module imported by client-side code.
If the package claims browser support but pulls in Node.js modules unexpectedly, review its browser entry points and report the issue to its maintainers if necessary. Adding polyfills is sometimes possible, but it can increase bundle size and may not reproduce the behavior of genuine Node.js APIs.
6. The Lockfile or Installed Dependencies Are Out of Sync
The package-lock.json file records the dependency tree resolved by npm. If package.json, the lockfile, and the installed node_modules directory do not agree, different environments can install different dependency versions or produce inconsistent results.
This commonly appears when a developer installs a package locally but does not commit the updated lockfile, or when local installation uses a different package manager from the CI environment.
Start by checking version-control changes:
git status
git diff — package.json package-lock.json
Review whether the package and lockfile changes are intentional. If the project uses npm and its lockfile is valid, npm ci is useful for testing a clean, reproducible installation:
npm ci
npm run build
Important: npm ci removes the existing node_modules directory and installs from the lockfile. Commit or preserve necessary local changes first. If the lockfile and package.json are out of sync, the command may fail rather than silently updating the lockfile.
Avoid deleting package-lock.json as the first troubleshooting step. Doing so can cause npm to resolve newer versions across the dependency tree, creating additional changes unrelated to the original problem.
7. TypeScript, CSS, or Build Configuration Errors
Not every package-related build failure is a dependency-resolution problem. A new library may introduce TypeScript type requirements, CSS imports, a required plugin, or configuration changes that your project does not support.
Examples include a missing stylesheet import, an incompatible TypeScript declaration, a required Vite plugin that is not configured, or an asset import that the bundler does not recognize.
Read the first relevant error carefully. If it points to a .css, .ts, configuration, or declaration file, follow that trail instead of repeatedly reinstalling the package.
Check the library’s installation instructions and version-specific migration notes. If the package requires a plugin or configuration option, add it according to the documentation and rerun the build. If the error points to your own code, update the import or type usage to match the library’s actual API.
For a broader debugging workflow, see [Why Does My Next.js App Show a Hydration Error? Common Causes and Practical Fixes]. Build errors and hydration errors occur at different stages, but identifying the precise error category is essential in both cases.
8. A Safe Step-by-Step Workflow for Fixing the Build
Use this sequence to avoid introducing unnecessary changes:
- Capture the first meaningful error. Run npm run build and record the first actionable error, not just the final summary.
- Review recent changes. Inspect package.json, package-lock.json, imports, and build configuration.
- Check compatibility. Verify the package’s supported framework versions, peer dependencies, Node.js requirements, and module format.
- Inspect the dependency tree. Use npm ls package-name or npm ls to find missing or invalid dependencies.
- Reproduce a clean install. If the project uses npm, run npm ci after preserving local work and ensuring the lockfile is correct.
- Apply one targeted change. Adjust a version, import, runtime, or configuration based on the evidence.
- Build and test again. Run the production build and relevant tests before committing the fix.
Commands such as npm install –legacy-peer-deps or npm install –force can bypass some dependency-resolution protections. They should not be the default solution because they may permit an incompatible dependency tree. Use them only when you understand the conflict and have a clear reason to accept the risk.
Conclusion
When a frontend build fails after installing or updating an npm package, the cause is usually found in dependency compatibility, runtime requirements, module resolution, module-system differences, browser-versus-server code, lockfile consistency, or build configuration.
Start with the first meaningful error and compare the project before and after the package change. Check compatibility, inspect the dependency tree, and use a clean installation when appropriate. Avoid deleting lockfiles or forcing dependency resolution without understanding why the failure occurred.
A targeted fix makes the build work while preserving a reproducible dependency setup for teammates, CI pipelines, and production deployments.
8. Frequently Asked Questions
1. Why does npm install succeed but npm run build fail?
Installation and building perform different tasks. npm resolves and installs dependencies, while the build tool must also compile your code, resolve imports, process assets, and apply framework-specific rules. A package can install successfully but fail during compilation because of incompatible APIs, unsupported module formats, missing exports, or Node.js-only dependencies imported into browser code. Run npm run build and investigate the first actionable error.
2. How do I fix an npm ERESOLVE dependency conflict?
First, identify which packages have incompatible version requirements in the error message. Check their peer dependencies and confirm which versions support your framework. Then install a compatible package version or make a deliberate, tested framework upgrade. Avoid immediately using –force or –legacy-peer-deps, because these options can bypass dependency-resolution protections without making incompatible packages work together.
3. Should I delete node_modules and package-lock.json when my build fails?
Not as a first step. Preserve package-lock.json because it helps reproduce the dependency tree across development and deployment environments. If the lockfile is valid and matches package.json, npm ci can recreate node_modules from the recorded dependencies. If the files are inconsistent, review the changes and correct the dependency configuration rather than automatically generating a new lockfile.
4. Why does my frontend work locally but fail during deployment?
The local and deployment environments may use different Node.js versions, operating systems, environment variables, or dependency installations. Case-sensitive file systems can also expose import paths that work on a developer’s machine but fail on Linux. Compare runtime versions, verify import capitalization, commit the correct lockfile, and reproduce the production installation and build locally where possible.
5. What does ERR_REQUIRE_ESM mean after updating an npm package?
This error usually indicates that code is trying to load an ECMAScript Module through an incompatible CommonJS require() path. Check whether the updated package is ESM-only and whether the failure occurs in application code or a configuration file. Use a supported import approach, update the configuration to the format supported by your tooling, or select a compatible package version. Avoid changing the entire project’s module type without checking the impact on other scripts.
6. How can I identify which npm package is breaking my build?
Review the error stack and recent dependency changes first. Run npm ls package-name to inspect a specific package or npm ls to review the dependency tree. Compare the current package.json and lockfile with the last working commit. If the error remains unclear, test a minimal reproduction or revert one recent package update at a time. This helps distinguish the package that introduced the failure from a separate problem elsewhere in the project.
Let’s Talk About Your Business
Not sure which approach is right for your business? Get a free consultation with our team.
Get Free Consultation